Sunday, December 28, 2008

Master Bath Update

For our vanity for the master bath we're refurbishing our IKEA kitchen island. I removed the butcherblock top, removed about a foot of width from the middle, and slapped it back together with braces. Reilly is priming and painting it black


It will get the concrete vanity top eventually. Speaking of, I was advised to let the concrete cure in the mold for several more days, so there it still sits for now. Probably Tuesday I can take it out and start polishing. I'll probably have to stain it, too, because it's come out really light gray -- not even close to black.

Anyway, we did have some other progress the last couple of days....tile!!


We think it came out really nice. Our original design was similar, but used 6 rows of 1/2" tiles, instead of 3 rows of 1". Turned out the 1/2" were hard to come by and we didn't want to wait.

We'll get grouted tomorrow (Monday), in a gray color pretty close to the color of the mortar bed (on the left, above).

Flushsink 1.0

This weekend I installed the prototype flushsink, a slight variation on this guy's methods and materials. Remember, the idea here is to take the clean water that's already coming into your toilet tank each time you flush, and wash your hands with it before it gets to the tank. Your hand-washing is the furthest "upstream" use of the water, and it's the same water through the same pipes that go to your other taps -- you are *not* washing with "toilet water"!!

This is the very basic, ugly materials quick-and-dirty version that can be removed easily. Version 2.0 will be more elaborate and finished looking.


I figure, use what you have! I was worried at first about which household bowl I might sacrifice by drilling holes, and then I saw this cheap-o clip on light in the garage. Remove the bulb fixture and it's already got a drain! On top of that, it easily can be dismantled and put back to its original use when upgrading to version 2.0.


Feed plastic tubing through copper piping for your "faucet." This isn't for cleanliness; it's mostly so you don't have to worry about soldering copper joints or worry about any leaks. Plus, it makes it easier to direct the discharged gray water back into the tank.


Cut a piece of ply any size and shape you want for your "countertop," with a drain hole and a hole for the "faucet" to come up through. Affix a small funnel to the underside so the drain will be channeled into a second, separate length of plastic tubing. Caulk the hell out of it.

Then caulk it some more.


And here's how it works! Very simple: Inside the tank, the clean water supply line tubing (black) usually goes straight to the white overflow pipe and pumps 1.3 gallons of fresh water into that pipe each time you flush. Now, the black supply line feeds up into the new sink, and the drain of the new sink feeds into the overflow in the tank. Presto!

Here's the finished product and a video of it in action.


Monday, December 22, 2008

DIY Concrete Vanity Top - Part III

This weekend was the moment of truth (ok, the first moment of truth anyway). I "poured" the concrete for the bathroom vanity!

When last we left our hero, the mold was ready to go with knock-outs for the sink and faucet drop-ins. One more bit of prep: to ensure that the concrete releases from the mold when it's cured, you should coat the interior mold surfaces with a releasing agent. You can buy these at masonry outfits for a bunch of money, or...


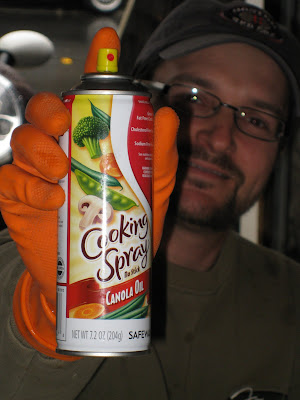
Safeway brand Pam cooking spray. $1.29.
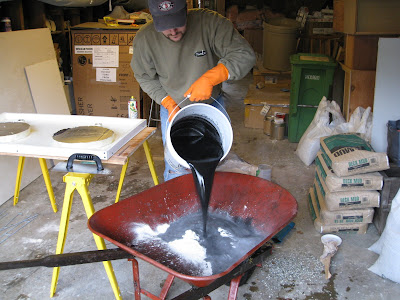


I used Buddy Rhodes products. I mixed one bag of concrete with black concrete pigment, although I used too much water for the pigment so couldn't get all the pigment into the concrete mix without the mix being too soupy. Hence, it's seeming to come out rather gray so far. We'll see after it's fully cured.


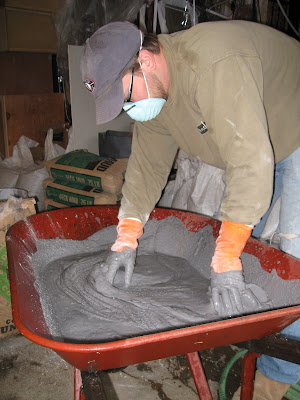
I started to mix with our Makita drill and a paint mixer, but quickly found it more efficient (if tiring) to just use my hands. Use PPE if trying this at home, kids!


Fill up the mold about 1/3 of the way, then add structural support. I used ladder wire, which should be more than enough for this small span.


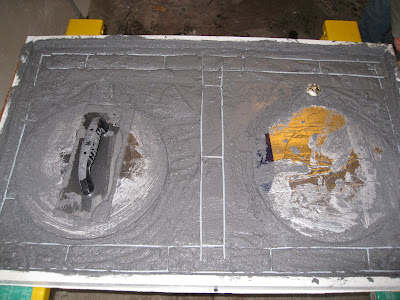
Fill 'er up the rest of the way, and smooth it out.


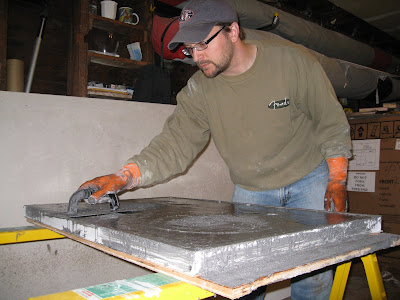
Trowel it glassy, and let cure for 3 days. I've been misting it and periodically re-trowelling over the last 48 hrs, periodically vibrating it to bring bubbles up and avoid lots of pitting in the finished product. By the time we're back from Santa Monica Christmas, it should be ready for Part IV: The Big Reveal (and sealing, and polishing, and...).

Wednesday, December 17, 2008

Kitchen progress

We applied the cake batter to the kitchen walls this weekend, and put back the lower cabinets.

The countertop contractors came by today to take a template, and it should be a couple of weeks (plus holidays...) to get our Caesarstone quartz countertops.


Here's where I've been trying to muddle through with basic carpentry. These are our old cabinets and I modified the sink box to accommodate a very different basin. Before, it had a double-basin cast iron drop in sink, and now we've put in a apron-front sink which protrudes from the cabinet face. Next, I'll need to do a lot of work on doors and drawer fronts, which we want to do as inset (existing doors sat on the surface and are not in the style we want). After all that, of course, these will be sanded down and painted an off-white color.

Why doesn't the cabinet to the left of the sink go all the way to the pantry wall? Because the pantry door will slide on a track on the wall surface, fitting into that space when open. It will be on an exposed track and we hope to make all barn-door-industrial looking and..... well, you'll see.


We decided last minute to move the dishwasher to the right side of the sink instead of where it had been on the left. This is visually more appealing as you walk into the room, but also unfortunately means we'll have to have a somewhat smaller upper cabinet there on the left. I have no idea where we're going to put all our crap.


Emma can already smell the home cookin'.

Sunday, December 14, 2008

DIY Concrete Vanity Top -- Part II

I had to start over with the mold. This one should work much better with the sides and knock-outs the correct height to make trowling straight across the top easier. Also, the melamine base will probably work better than trash bags... :-)


I didn't get much farther than I was at the end of "Part I," but now the mold is complete and ready to go. The next installment will be mixing and pouring the concrete.

To tide over our literally millions of fans until then, here's Jason being a complete dork:

Thursday, December 11, 2008

54.5 days.

But who's counting?


YaaHHOOOOOO!!!

Monday, December 8, 2008

New Floors!

The hardwood floors were installed last Friday and Saturday. Other than enduring some pretty noxious fumes for a couple of days, things are looking pretty good.


No puppy paws allowed!


Tuesday, December 2, 2008

DIY Concrete Bathroom Vanity Top - Part I

I finally got started on the cast stone vanity top. I figure as a project, it's pretty manageable for my first time. Our vanity will be only 36" wide but will have two basins and two cut-outs for faucets, so the actual amount of concrete won't be all that much.

Step 1: Build the mold


This will be cast right side up. You can see a short video example of it here.

I lined the bottom of the mold with plastic and caulked all the joints. Step II will be to make the sink and faucet knock-outs from foam core, but this is as far as I got over the weekend.


Monday, December 1, 2008

Walls

So we've got some sheetrock now. In fact, as of today, it apears all the rocking is done. It's kinda difficult to get a decent photo (especially of the small bathrooms), but here goes:

This is the view of the dining room, looking into the kitchen. Master bedroom doorway on the right.


This is the opposite view, looking from the kitchen back into the dining room.


This is the new wall in the kitchen creating the "pantry"


This is our new bedroom closet. :-))


And these indecipherable things are the small bathrooms. "Guest":


and "Master"